Welcome to your ultimate guide on building a retaining wall on a slope! If you’ve ever looked at a sloping backyard and felt unsure of how to make the space functional or visually appealing, you’re not alone. Retaining walls are a great way to control erosion, create flat areas for gardens or seating, and add a unique aesthetic to your landscape. In this post, we’ll walk you through everything you need to know about building a sturdy retaining wall, even if you’re a first-timer. From planning to execution, we’ll cover essential tips, tools, and techniques to help you transform that tricky slope into a beautifully structured, usable space. Let’s get started!
To build a retaining wall on a slope, start by marking and excavating the area, then lay a strong foundation with compacted gravel. Place the first course of blocks, ensuring they are level and slightly slanted backward for stability. Add drainage pipes to prevent water buildup, backfill with gravel, and continue laying courses while staggering the blocks. Finish by installing capstones for a polished look, and ensure proper drainage to prevent wall failure. Regular maintenance can keep your retaining wall strong for years.
Table of Contents
Understanding The Purpose Of A Retaining Wall
A retaining wall serves both functional and aesthetic purposes in landscaping and construction. Whether you’re dealing with sloped terrain or simply want to create more usable outdoor space, retaining walls are a great solution for managing soil, preventing erosion, and enhancing the overall appearance of your property. Let’s break down what a retaining wall is, why it’s essential for certain types of terrain, and how it works.
What is a Retaining Wall?
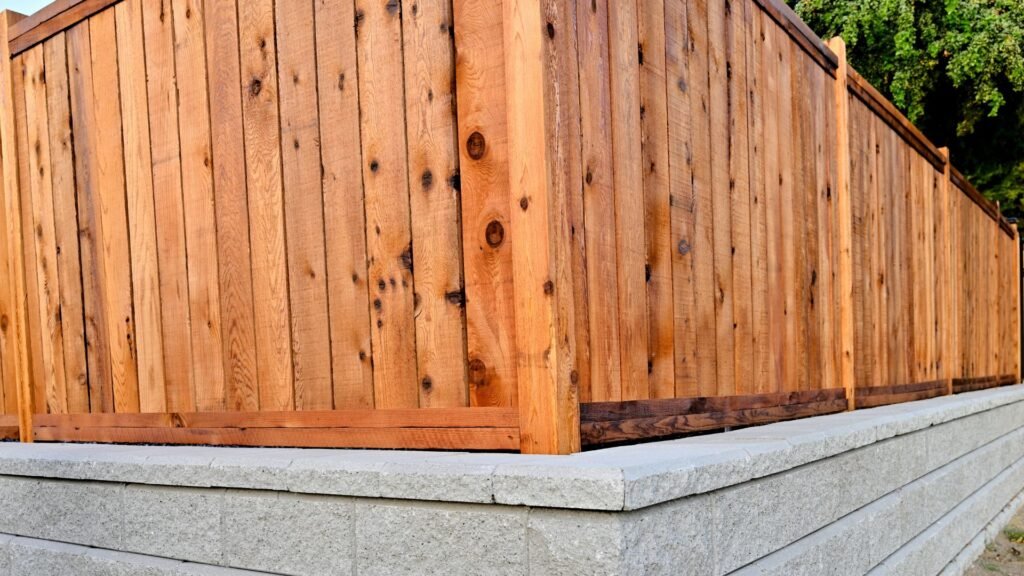
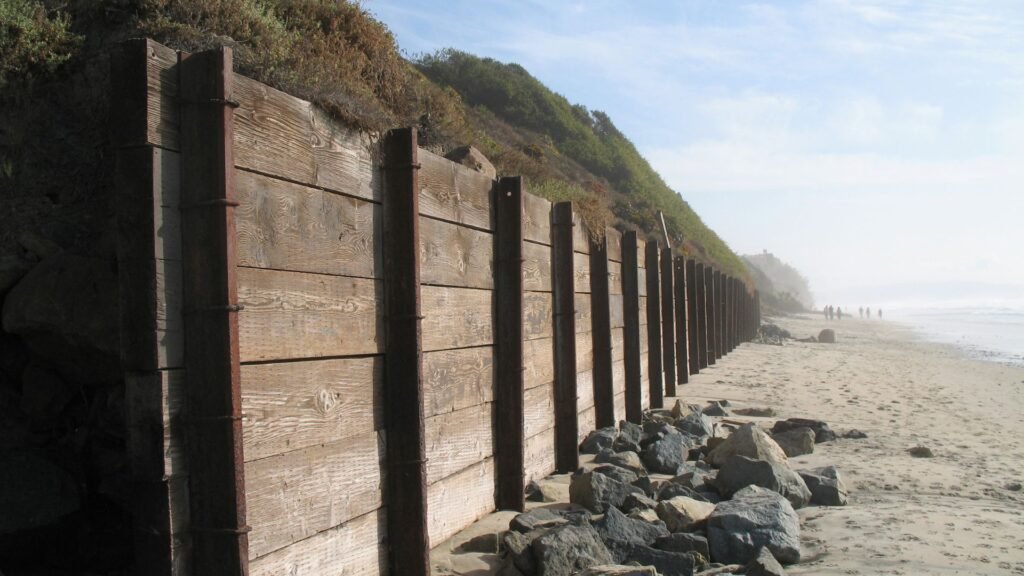
A retaining wall is a structure built to hold or retain soil behind it. It is typically used when a significant change in elevation exists, such as on sloping land. Without a retaining wall, soil can shift, erode, or move downhill over time, causing damage to the surrounding landscape or even buildings. Retaining walls are engineered to counteract this natural movement by creating a barrier that keeps the soil in place. These walls come in various materials, including stone, concrete, wood, and even reinforced earth, depending on the design and purpose.
Why Build on a Slope?
Building a retaining wall on a slope offers several benefits, especially in areas where the terrain is uneven. Let’s explore some of the most important reasons:
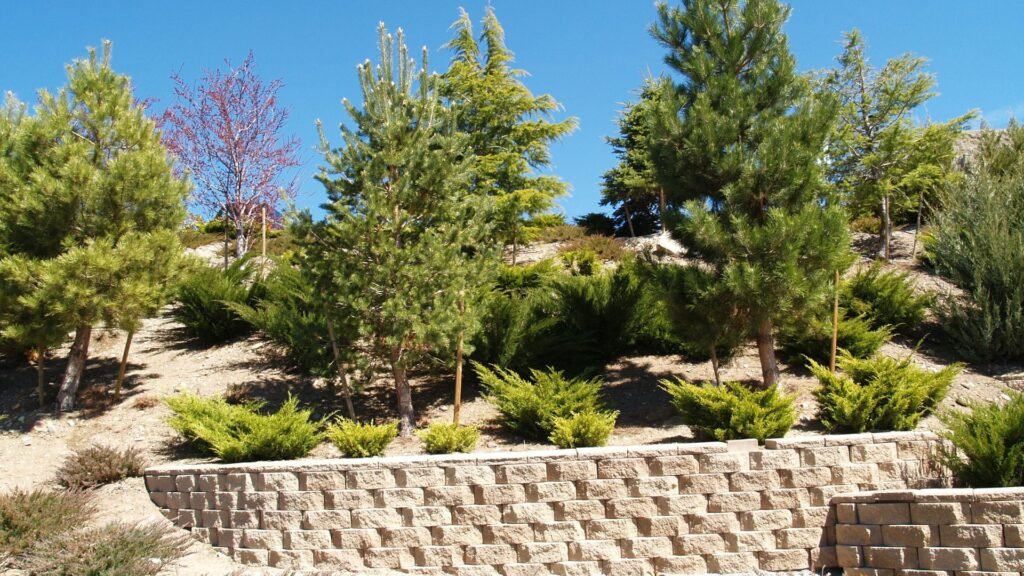
1. Prevents Soil Erosion: One of the primary reasons for building a retaining wall is to combat soil erosion. Sloped land is more susceptible to erosion, where rain and wind can gradually wear away soil, causing it to slide down the slope. A retaining wall acts as a stabilizing force, holding the soil in place and preventing this from happening, particularly during heavy rainfall or water runoff.
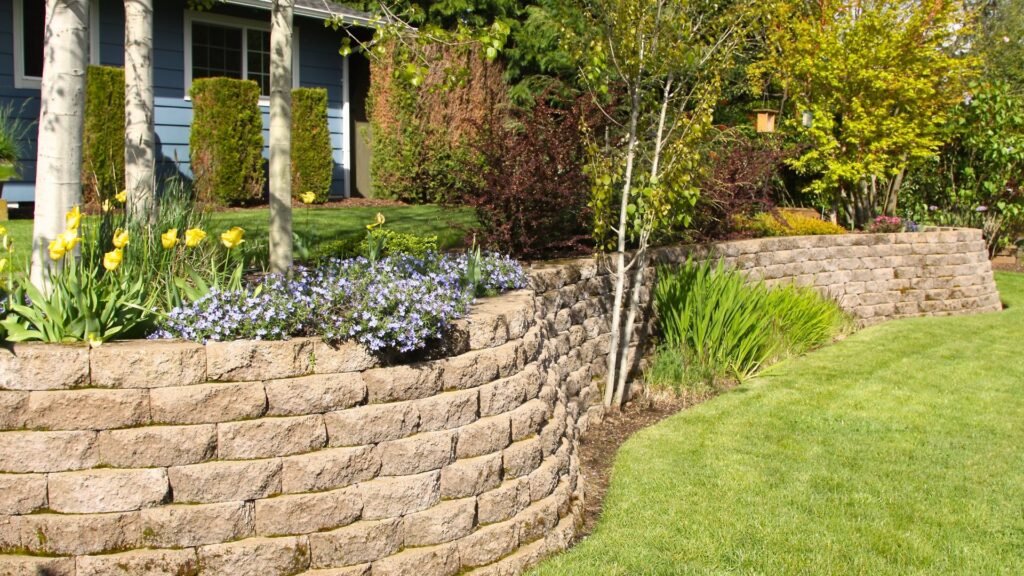
2. Creates Usable Space: Retaining walls are often used to level out sloping ground, turning previously unusable space into functional areas. You can transform a hillside into a flat, usable area for a garden, patio, or seating area. These leveled spaces can be perfect for outdoor entertaining or simply expanding your living area into the outdoors, adding more versatility to your property.
3. Adds Value and Curb Appeal to the Home: In addition to its functional benefits, a retaining wall can significantly enhance the appearance of your landscape. A well-designed retaining wall adds structure and visual interest, giving your property a polished, professional look. This not only improves curb appeal but can also increase the overall value of your home, making it an attractive feature for potential buyers.
How It Works
Retaining walls work by using a combination of gravity, engineering, and construction materials to hold back the earth. The principle behind most retaining walls is to create a solid, stable barrier that resists the pressure exerted by the soil behind it. This is achieved through careful design and the use of strong, durable materials.
The wall’s design ensures that the force of gravity pulls it downward, which in turn stabilizes the soil behind it. Retaining walls are often built with a slight backward slope (called “batter”) to enhance stability. Additionally, proper drainage is crucial—many retaining walls have built-in drainage systems or weep holes to allow water to pass through, reducing the hydrostatic pressure that can build up behind the wall.
In essence, retaining walls are a combination of physics and smart construction techniques, working together to manage soil, prevent erosion, and create beautiful, functional spaces in your yard.
By understanding the purpose and function of retaining walls, you can better appreciate their importance in both residential and commercial landscaping. Whether you’re looking to enhance your home’s exterior or solve an erosion problem, a retaining wall may be the ideal solution.

Pre-Planning: What You Need To Know Before You Start
When it comes to building a retaining wall, proper planning is crucial. Taking the time to evaluate your site, understand local regulations, and gather the right materials will save you time, money, and frustration in the long run. Here’s a detailed breakdown of what you need to know before starting your project:
Evaluate the Site
Before any construction begins, you’ll need to thoroughly assess the area where your retaining wall will be built. Here are some key aspects to consider:
- Slope Steepness: Understanding the steepness of your slope is the first step. The steeper the slope, the more complex the wall construction will be, and it may even require a reinforced design to ensure it can handle the pressure of the soil behind it.
- Drainage: Water management is one of the most critical factors in building a retaining wall. Poor drainage can lead to water buildup behind the wall, increasing pressure and eventually causing structural failure. Check how water flows through the area after heavy rainfall to determine if additional drainage solutions are needed.
- Soil Type: The type of soil on your property can significantly impact the success of your retaining wall. For instance:
- Sandy soil drains well but lacks stability, requiring additional support.
- Clay soil retains water and can expand, which adds stress to your wall.
- Loamy soil provides a balance of stability and drainage, making it ideal for most projects.
Each type of soil reacts differently under pressure, so understanding your soil’s characteristics will help you choose the right design and materials for your wall.
Check Local Building Codes
Every municipality has specific rules and regulations concerning construction projects, including retaining walls. Before breaking ground, it’s essential to check with your local authorities about any required permits. In many areas, walls above a certain height (typically 3 to 4 feet) will require a permit, and the design may need to be approved by an engineer. Ignoring local building codes could result in fines, or worse, having to dismantle your wall entirely.
DIY or Professional Help?
One of the most important decisions you’ll make is whether to take on this project yourself or hire a professional. Consider the following:
DIY Feasibility: If you’re comfortable with basic construction techniques and your wall is relatively short (under 4 feet), you might be able to tackle this project yourself. Building a retaining wall requires precision, so you’ll need to be familiar with leveling, compacting soil, and ensuring proper drainage.
Hiring a Professional: For more complex projects, especially those involving tall walls, steep slopes, or tricky soil conditions, it may be wise to hire a professional. Professionals have the experience to ensure your wall is structurally sound and meets all legal requirements. Additionally, some contractors offer warranties, giving you peace of mind that your investment is protected.
Materials You’ll Need
Once you’ve decided on the scope of the project and assessed the site, it’s time to gather materials. Commonly used materials include:
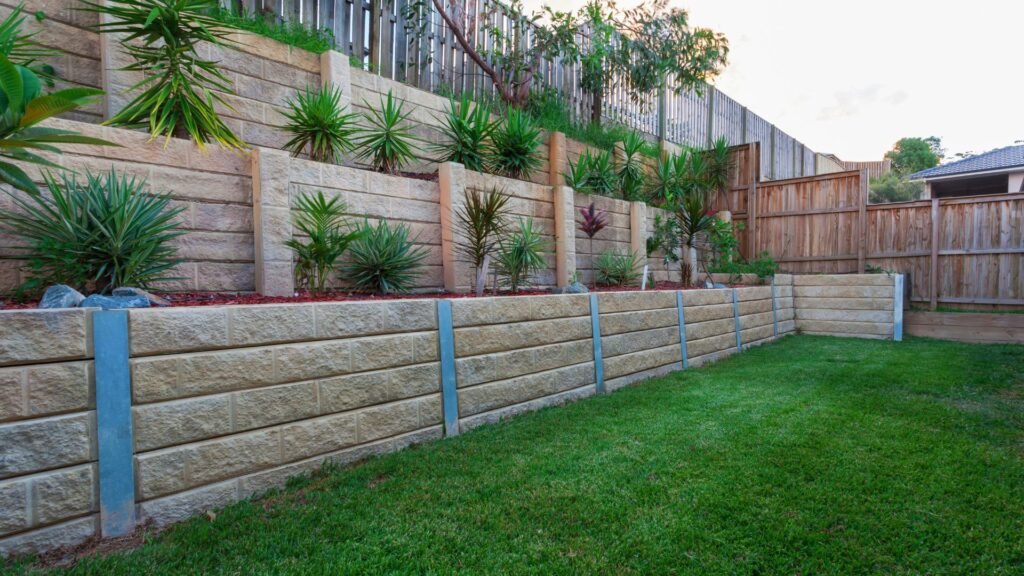
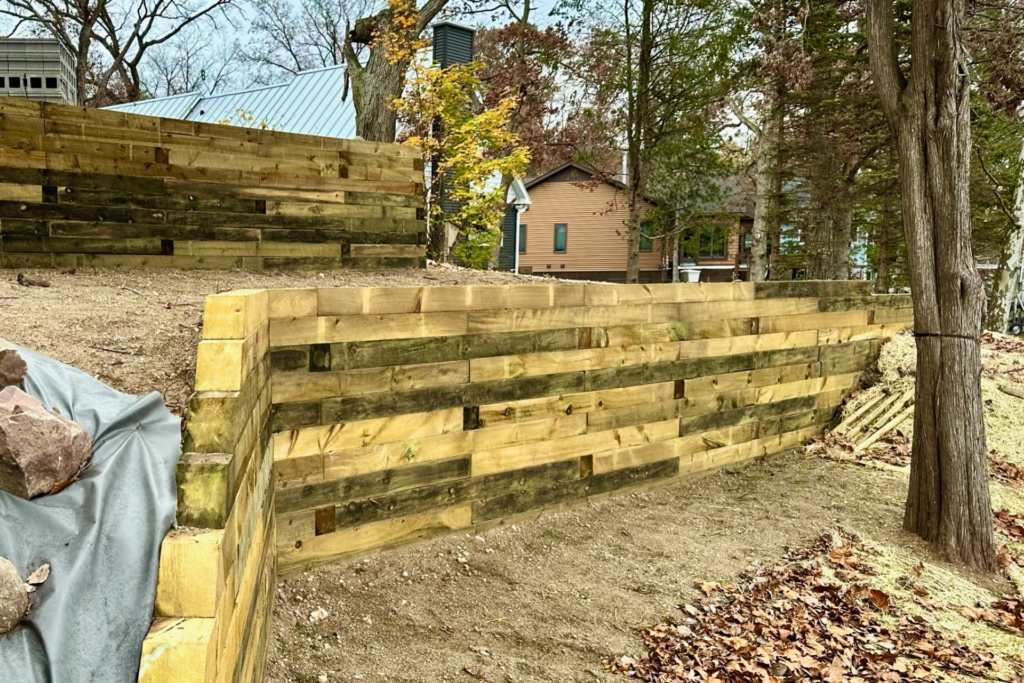
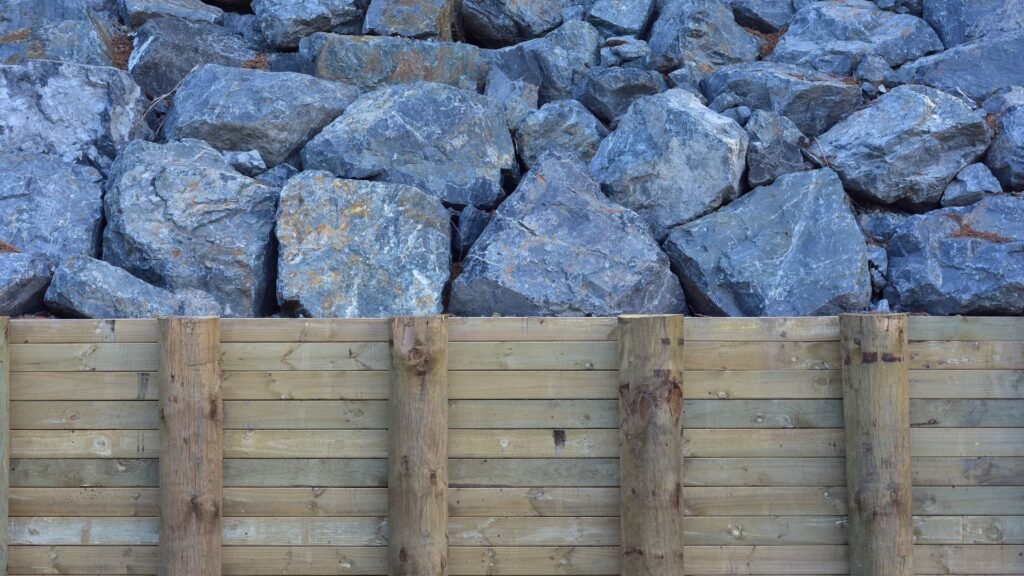
- Blocks or Stones: The most popular choices for retaining walls are concrete blocks, natural stone, or wood. Concrete blocks are sturdy, easy to work with, and available in various sizes. Natural stone offers a more aesthetic, organic look but can be more difficult to install. Wooden retaining walls can provide a rustic appearance, though they may not last as long as stone or concrete due to weathering.
- Gravel, Sand, or Crushed Stone: These materials are crucial for creating a strong foundation and improving drainage. Gravel or crushed stone is typically used behind the wall to help water escape, reducing pressure on the wall.
- Drainage Pipes: To prevent water buildup, you’ll need to install drainage pipes at the base of the wall. This ensures that water can exit freely, preventing damage over time.
- Tools: The right tools will make the job much easier. For most retaining walls, you’ll need:
- Shovels for digging the trench and moving soil.
- A tamper to compact the soil and foundation materials.
- A level to ensure each layer of the wall is even.
- Stakes and string to mark your wall’s boundaries and guide the construction.
Set a Realistic Budget
Finally, you’ll need to set a budget for your project. Retaining walls can range in cost depending on materials, size, and whether you choose to hire a professional. When budgeting, remember to account for the following:
- Materials: The cost of concrete blocks, stones, or wood can vary widely. Make sure to estimate how much material you’ll need based on the size of the wall.
- Labor: If you’re hiring a professional, get quotes from multiple contractors to find a reasonable rate.
- Permits: Don’t forget to include any permit fees, which can vary depending on your location.
Proper budgeting ensures that you’re not caught off guard by unexpected expenses during the construction process.
By following these steps, you’ll be well-prepared to tackle your retaining wall project with confidence. Careful pre-planning sets the foundation for a successful and durable retaining wall that not only looks great but also functions effectively for years to come.

Step-By-Step Guide To Building A Retaining Wall On A Slope
Building a retaining wall on a slope can be a great solution for controlling erosion, leveling your yard, or creating more usable space in your landscape. Whether you’re a seasoned DIYer or tackling this for the first time, following a clear step-by-step process is key to ensuring your retaining wall is not only functional but also lasts for years. Here’s a detailed guide to help you achieve professional results.
Step 1: Mark and Excavate the Area
The first step is all about planning and preparation. Start by measuring and marking the area where your retaining wall will be constructed. Use stakes and string lines to outline the dimensions of your wall. This will help you keep everything straight and organized as you progress through the build.
When it comes to excavation, dig a trench for your retaining wall’s foundation. As a general rule, the trench should be about twice as wide as the blocks or stones you plan to use. The depth should allow the first row of blocks to sit below ground level, usually about 6 inches, ensuring stability.
- Pro Tip: To avoid issues with uneven settling, make sure the trench base is perfectly level by using a carpenter’s level. This is crucial for the stability of the entire structure.
Step 2: Create a Strong Foundation
A solid foundation is the backbone of any retaining wall, especially on a slope. Once the trench is ready, lay down a base layer of gravel or crushed stone, about 4 to 6 inches deep. Gravel provides excellent drainage and prevents water from pooling underneath the wall, which can lead to shifting or sinking.
Next, compact the gravel layer using a hand tamper or a mechanical compactor. This step is essential to prevent the base from moving over time due to soil pressure or moisture changes.
- Pro Tip: Compacting the gravel thoroughly will create a firm base that supports the weight of the wall, reducing the risk of future movement or cracks.
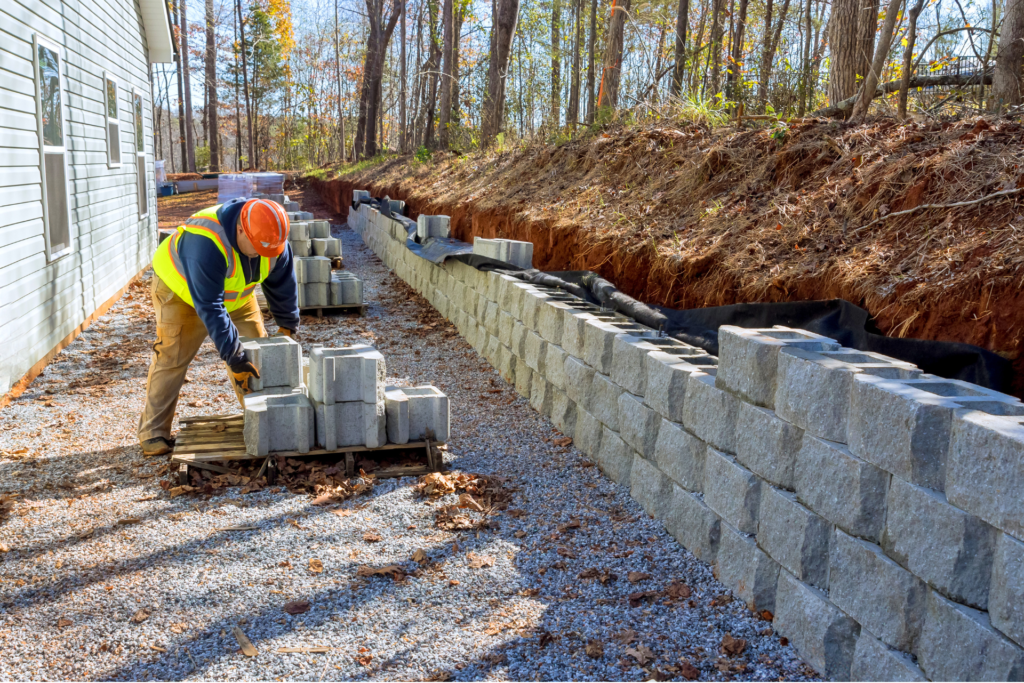
Step 3: Lay the First Course of Blocks or Stones
Now that the foundation is set, it’s time to lay the first course of blocks. This is arguably the most important step in building a retaining wall, as it will determine the overall alignment and stability of the entire structure. Start by placing your blocks on the compacted gravel, making sure they are level from side to side and front to back.
The first layer should fit tightly into the trench and sit perfectly level. Take your time with this step, as any mistake here will magnify as you add more layers.
- Pro Tip: For additional strength, lay the blocks with a slight backward slope—about 1 inch per foot of height. This is called “battering,” and it helps the wall resist the pressure of the soil behind it.
Step 4: Backfill and Add Drainage
After the first course of blocks is in place, it’s time to backfill the space behind the wall with gravel or drainage aggregate. The backfill helps reinforce the wall and improves drainage, reducing the risk of water buildup, which can weaken the wall over time.
Additionally, installing a perforated drainage pipe behind the first row of blocks will channel water away from the wall, preventing hydrostatic pressure from causing damage.
- Pro Tip: Proper drainage is critical. Poor drainage can cause the wall to fail due to the buildup of water pressure behind it, so take your time to ensure this step is done correctly.
Step 5: Continue Laying Courses
As you build up the wall, continue laying the blocks or stones in staggered rows. This creates a strong, interlocking structure that will stand up to the pressure from the soil behind it. Each new course should be offset from the one below it, which adds stability.
Depending on the material you’re using, you may also need to use adhesive or special pins to secure the blocks. This helps keep everything in place, especially as the height of the wall increases.
- Pro Tip: Staggering the blocks creates a stronger structure. If your wall is taller than 4 feet, you may want to consider reinforcing it with geogrid for added support.
Step 6: Cap the Wall and Finalize
The final step in building your retaining wall is to cap it off for a clean, finished look. Capstones or finishing blocks not only enhance the appearance of the wall but also provide added weight at the top, which helps stabilize the entire structure.
Once the capstones are in place, you can apply a weatherproof sealant if your wall is made of concrete, stone, or other materials that might benefit from extra protection against the elements.
- Pro Tip: Sealing your wall will protect it from moisture damage, freeze-thaw cycles, and other environmental factors, ensuring it stays beautiful and strong for years to come.
5. Common Mistakes to Avoid When Building a Retaining Wall on a Slope
While building a retaining wall may seem straightforward, there are a few common mistakes that can lead to costly repairs or even total failure of the wall. Here’s what to watch out for:
- Skipping Drainage: One of the biggest errors is not incorporating proper drainage behind the wall. Without a way for water to escape, pressure builds up behind the wall, leading to cracks or collapse.
- Improper Base Preparation: The foundation of your wall is crucial. If the base isn’t deep enough or not compacted properly, the wall may settle unevenly, leading to an unstable structure.
- Not Accounting for Slope: Failing to account for the slope’s angle can result in a wall that doesn’t hold back the soil properly, leading to erosion or collapse. Always ensure the wall is slightly sloped backward into the hill for added strength.
- Overloading the Wall: Overloading the retaining wall with too much soil, weight, or pressure can cause it to buckle. Ensure your design can handle the load it will bear, and avoid exceeding the height recommendations without professional reinforcement.
By following this guide and avoiding common pitfalls, you can successfully build a retaining wall on a slope that not only enhances your outdoor space but also lasts for years to come.

Common Mistakes To Avoid When Building A Retaining Wall On A Slope
When constructing a retaining wall on a slope, it’s easy to overlook critical steps that ensure its stability and longevity. Here are some common mistakes that many DIYers and even professionals make, which can lead to significant issues if not addressed properly.
1. Skipping Drainage
One of the most common and costly mistakes when building a retaining wall is neglecting proper drainage. Water build-up behind the wall can create immense pressure, eventually causing the structure to fail. Without an efficient drainage system, such as gravel backfill or drainage pipes, the soil becomes saturated during heavy rainfall or irrigation. This water adds weight, increasing the lateral pressure behind the wall and potentially leading to cracks, bowing, or complete collapse over time.
- Solution: Always incorporate a drainage plan from the beginning. Use materials like gravel, perforated pipes, and weep holes to ensure water has a proper exit route, reducing the risk of hydrostatic pressure building up behind your wall.
2. Improper Base Preparation
A solid foundation is key to a retaining wall’s strength, but many people make the mistake of skipping or inadequately preparing the base. Using a shallow, poorly compacted base can result in uneven settling, which weakens the entire structure. Over time, this can lead to shifting, leaning, or cracking of the wall.
- Solution: Invest time in preparing a deep and properly compacted base. This often involves digging a trench below ground level and filling it with crushed stone or gravel, then compacting it thoroughly. A well-built base provides the necessary support to handle the weight of the wall and the pressure from the soil behind it.
3. Not Accounting for Slope
Building a retaining wall on flat land is vastly different from constructing one on a slope. Many DIYers underestimate the importance of factoring in the slope’s angle when planning their project. A wall that doesn’t take the incline into account can easily become unstable, as the forces exerted on it by the sloped soil are different from those on level ground.
- Solution: Always design the retaining wall with the slope in mind. This might mean stepping the wall back as you go up, or even terracing the slope into multiple smaller walls. Additionally, use proper reinforcement, like geogrid, to provide extra support against the unique forces presented by the incline.
4. Overloading the Wall
Another frequent mistake is overloading the retaining wall, either by placing too much weight directly behind it or failing to anticipate future loads. Retaining walls are built to withstand specific pressures, primarily from soil. However, adding heavy structures, vehicles, or overly dense soil mixtures can exceed the wall’s capacity. This excess weight can cause the wall to lean, crack, or even collapse under the pressure.
- Solution: Be mindful of the weight that the retaining wall will need to support, both now and in the future. Avoid placing heavy objects, such as sheds, patios, or large garden beds, directly behind the wall unless it’s specifically designed to handle such loads. Additionally, consulting with a structural engineer can provide more insight into how much weight your retaining wall can bear safely.
By avoiding these common mistakes, you can ensure your retaining wall remains strong, functional, and aesthetically pleasing for years to come.
Maintenance Tips To Keep Your Retaining Wall Strong For Years
A well-maintained retaining wall not only adds beauty and structure to your outdoor space but also serves an important functional purpose by holding back soil and preventing erosion. Like any structure, retaining walls require periodic care to ensure they stay strong and effective for years to come. Below are some essential maintenance tips to help extend the life of your retaining wall:
1. Regular Inspections
One of the most crucial steps in maintaining your retaining wall is conducting regular inspections. Over time, natural elements like rain, wind, and temperature changes can affect the integrity of the wall. After heavy rainfall or storms, take a moment to inspect your wall for any signs of stress, such as cracks, leaning, or bulging. These issues, if left unaddressed, can worsen over time and may lead to structural failure.
For block retaining walls, check for any gaps between the blocks or sections that appear to be shifting. If your wall is made of natural stone or timber, look for signs of decay, such as rotting wood or crumbling stone. Identifying problems early on allows you to address them before they escalate into more costly repairs.
2. Weed and Plant Control
While plants can enhance the aesthetic appeal of your landscape, they can pose a threat to the stability of your retaining wall. Weeds and invasive plant roots can grow into the small gaps between blocks or stones, potentially causing the wall to shift or crack over time.
Make it a habit to regularly clear out any unwanted vegetation near the base of the wall or between the crevices. If you notice larger plants or trees growing too close to the wall, consider removing them or trimming their roots. The root systems of these plants can apply pressure on the wall, compromising its structural integrity.
On the flip side, if you enjoy greenery near your retaining wall, choose plants with shallow root systems. These will add visual appeal without putting stress on the structure.
3. Repairing Damage
Minor damages, such as loose or displaced blocks, should be addressed immediately to prevent larger issues from developing. Here are a few basic repair tips:
- Replacing Loose Blocks: If you notice a block is loose or has shifted, carefully remove it and check the area beneath for any signs of erosion or water damage. Once you’ve addressed the underlying issue, reposition the block securely in place.
- Addressing Drainage Issues: Retaining walls are often built with drainage in mind, but over time, drainage systems can become blocked or inefficient. Poor drainage leads to water buildup behind the wall, which adds pressure and increases the risk of cracking or bulging. Ensure that drainage pipes or weep holes are clear of debris. If you notice pooling water or slow drainage, it may be time to consult a professional to assess and fix the problem.
- Crack Repair: Small cracks can develop in your retaining wall, especially after severe weather or freeze-thaw cycles. For concrete walls, use a high-quality masonry sealant to fill cracks and prevent water infiltration. For block or stone walls, mortar can be used to fill gaps and restore the wall’s appearance and strength.
In summary, keeping your retaining wall in top shape doesn’t require a lot of effort but does demand consistency. By conducting regular inspections, managing weeds and plants, and addressing minor repairs promptly, you can ensure that your retaining wall remains both beautiful and functional for many years to come.

When To Call In A Professional
While tackling home improvement or landscaping projects on your own can be rewarding, there are certain situations where it’s better to call in a professional. Knowing when to seek expert help can save you from costly mistakes and ensure the job is done safely and efficiently. Here are a few scenarios where hiring a pro is the smart move.
Knowing Your Limits
It’s essential to recognize when a project goes beyond your skill set or comfort level. Here are some examples of when you should consider professional oversight:
- Walls Over 4 Feet Tall: If you’re building a retaining wall that exceeds four feet in height, it’s time to call in an expert. At this height, the structural integrity of the wall becomes critical, and professionals have the necessary knowledge to ensure it’s built to withstand pressure and last for years. Larger walls may also require permits and adherence to local building codes, which a professional can handle smoothly.
- Complex Drainage Issues: Poor drainage can lead to water damage, soil erosion, and other costly issues down the line. If your project involves an area prone to water accumulation or if you’re unsure about how to manage runoff effectively, it’s a good idea to consult a professional. They can assess the situation and design a drainage solution that prevents future problems, such as foundation damage or flooding.
- Steep or Unstable Slopes: When working on projects involving very steep or unstable slopes, the risk factor increases significantly. In these cases, it’s crucial to ensure the landscape is stabilized properly. Professionals can evaluate the terrain and use specialized techniques like terracing or retaining structures to secure the area. They also have access to heavy machinery that may be required to get the job done safely and efficiently.
What to Look for in a Contractor
Once you’ve identified that your project requires professional assistance, finding the right contractor is key to success. Here are some tips to help you choose a reputable contractor:
- Licenses and Certifications: Always ensure the contractor you hire is licensed and certified to perform the work you need. This is not only a sign of professionalism, but it also protects you legally and financially in case anything goes wrong. Verify their credentials with local regulatory bodies.
- Reviews and Testimonials: Do your homework by checking online reviews, testimonials, and ratings on platforms like Google, Yelp, or the Better Business Bureau. A contractor with consistently positive reviews and satisfied customers is more likely to deliver quality results. Don’t hesitate to ask for references from previous clients to get a firsthand account of their work.
- Portfolio of Past Work: A reputable contractor will have a portfolio showcasing their past projects. Reviewing this portfolio will give you a sense of their style, expertise, and the type of work they specialize in. It’s also a great way to gather inspiration and ensure their experience aligns with your project needs.
Hiring a professional can make all the difference between a project that meets your expectations and one that becomes a costly headache. When the scope of the work demands it, don’t hesitate to seek expert help to ensure the job is done right, safely, and efficiently.

FAQs: About Building A Retaining Wall On A Slope
How do I determine if my slope needs a retaining wall?
A retaining wall is necessary if your slope is causing soil erosion, or if you want to create flat, usable areas in your yard. Slopes that are prone to heavy runoff or instability often benefit from the added support a retaining wall provides.
What materials are best for building a retaining wall on a slope?
Common materials for retaining walls include concrete blocks, natural stone, brick, and wood. Concrete blocks are often the easiest for DIY projects due to their interlocking design and durability. Natural stone offers a more rustic appearance, while wood is cost-effective but less durable over time.
Do I need drainage behind my retaining wall?
Yes, proper drainage is crucial to prevent water pressure from building up behind the wall, which can cause the structure to fail. Installing drainage pipes and backfilling with gravel or crushed stone allows water to flow away from the wall, ensuring stability.
How tall can I build a retaining wall without a permit?
The height limit varies by location, but most areas allow walls up to 3-4 feet tall without a permit. Check your local building codes before starting your project, as some regions may have stricter regulations or require professional engineering for taller walls.
Can I build a retaining wall on a steep slope?
Yes, but the steeper the slope, the more challenging the project. For very steep slopes, consider terracing with multiple smaller walls or consult a professional for additional support and design to ensure long-term stability.
How do I ensure my retaining wall lasts a long time?
To ensure longevity, use high-quality materials, provide adequate drainage, and make sure the foundation is solid and level. Regular inspections, repairing minor damage, and maintaining good drainage will help extend the life of your retaining wall.
What are common mistakes to avoid when building a retaining wall?
Common mistakes include skipping drainage, not compacting the foundation properly, failing to account for the slope’s angle, and building too high without reinforcement. All of these issues can lead to wall failure over time.
Can I build a retaining wall by myself, or should I hire a professional?
Building a retaining wall is doable for many DIYers, especially for walls under 4 feet tall. However, if the slope is steep, the wall is tall, or drainage is complex, it might be best to consult a professional to ensure the wall is structurally sound.
How long does it take to build a retaining wall on a slope?
The time required depends on the size and complexity of the wall. For a small DIY project, it could take a weekend or two. Larger or more complex walls, especially those that require professional help, can take several weeks to complete.
What are the best plants to grow near or on a retaining wall?
Groundcovers like creeping thyme, sedum, or ornamental grasses work well on or near retaining walls, as they help with erosion control and soften the look of the wall. Be mindful not to plant anything with aggressive roots that could damage the wall over time.
Conclusion
Building a retaining wall on a slope is a rewarding project that can be successfully accomplished with proper planning and careful attention to detail. By understanding the steps involved and taking the time to prepare, anyone can tackle this task and enhance the beauty and functionality of their outdoor space. This project is not just a one-time effort; it’s a long-term investment that will improve your landscape for years to come. If you’re considering starting this project, now is the perfect time to dive in and get hands-on. Remember, every challenge can be overcome with the right approach, and your hard work will pay off in a stunning result. Don’t hesitate to share your progress in the comments or ask for guidance if needed—this is a journey we’re all on together, and your experience might inspire others!
About the Author:
Mike Veail is a recognized digital marketing expert with over 6 years of experience in helping tradespeople and small businesses thrive online. A former quantity surveyor, Mike combines deep industry knowledge with hands-on expertise in SEO and Google Ads. His marketing strategies are tailored to the specific needs of the trades sector, helping businesses increase visibility and generate more leads through proven, ethical methods.
Mike has successfully partnered with numerous companies, establishing a track record of delivering measurable results. His work has been featured across various platforms that showcase his expertise in lead generation and online marketing for the trades sector.
Learn more about Mike's experience and services at https://theleadguy.online or follow him on social media: